Lesson Notes By Weeks and Term - Primary 6
World processing environment
World processing environment
WEEK 9&10
Subject: Information and Computer Technology�
Term: 1st Term
Class: Primary 6
Topic: Word processing Environment
Behavioral objectives: at the end of the lesson. Pupils� should be able to: A computer with
�(i) Identify the title bar a word processor
(ii). Identify and use menu installed
iii).Identify tools bar and its Functions
�IV Identify and use the tool
V Bold, underline and Italicize text
Vi Format font type, font Size and color
INSTRUCTIONAL MATERIALS:
A functional computer system
Reference Materials
Lagos state scheme of work,
Online information
Relevant materials
Pupils textbook
Behavioral Objectives: pupils are familiar with the topic in their previous classes
�
CONTENT
TITLE BAR
The title bar shows name of the program or application you are using. It also display which of the documents or books of MICROSOFT word you have opened.
It has the minimize, maximize, and close buttons to the extreme right hand side.
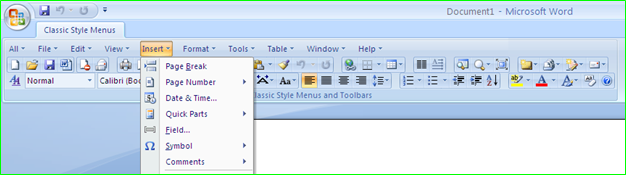
MENU BAR
The menu bar is located below the title bar. This bar has different menu such as file, edit, view, insert etc. Menu has different commands, which can be performed. When you click a menu the pull down menu appears. It contains different commands. The menu and their commands can be performed through the use of the mouse by clicking on the desired option or command.
You can also use the keyboard to select a menu option, press the ALT key and the underlined letter of the menu you want. To close a menu without making a selection press ESC key.
�
STANDARD TOOLBAR
The standard tool bar contains what is called icons. These icons are tools or commands we use when using Ms-Word. Some of the icons on the standard tool bar includes: New, open, save, print, cut, copy, paste, undo etc.
They are used as shortcuts instead of going into the Menu to pick commands. Most of the commands on the standard toolbar are the commands found in File and Edit menu.
FORMAT TOOLBAR
The format toolbar or format icons are useful when adjusting the appearance of your document. They provide a shortcut for you to underline, italicize, bold, align, and change font size and font styles. These commands are also found inside the Format menu.
BLANK SCREEN
The blank screen of Microsoft word is also tailed the work area. This is the part of the screen where you can type your document. Whether it is a letter, note, memo or report.�
When typing, the cursor begins to move to the right margin. The words that cannot fit into a line moves into the next line. This is called word-wrap.
The ENTER key could only be used in MS-Word to:
SCROLL ARROW:
There are two scroll bars containing scroll arrows in every application most especially Microsoft word, They are vertical and horizontal scroll bars. They contain scroll arrows, which are used to move around large documents.
SAVING FILES IN MS-WORD
When you are working with document, it is necessary that documents must be saved into disk to avoid sudden loss of data, which could sometimes be very painful. You could be working on an important document, which perhaps has taken two or three hours and all of a sudden your power source snapped off. This will lead to loss of document or data. It is. Therefore necessary tha document or data is saved into a disk.
The save option or command can be found under the FILE MENU in all window applications. The file menu contains two of these save commands. These are the SAVE and SAVE AS.
SAVE COMMAND
The save command is used to save changes to an existing file. This means the file or document existed before on the computer but you carried out some additions or deletion or little rearrangement on the document, which you have to save. While SAVE AS command is used to save a new file or to save an existing file under a new name.
USING SAVE AS
USING SAVE OPTION
You can as well use your keyboard by pressing CTRL and S together
PRINTING A DOCUMENT
Printing is the act of reproducing the same document on a computer screen on paper. In order words making a hard copy of a document.
To print a document in MS-Word, follow these steps.
The keyboard shortcut for printing is CTRL + P.
Editing simply means making changes or correcting mistakes in a document. Some of the actions that can be performed when editing a document includes: cutting, copying, pasting, inserting, deleting etc.
OPENING A FILE OR DOCUMENT
When a file or document which has been saved previously I on a disk is brought back to the screen, this means that the file or document is opened. This can be done through the open command in the file menu.
Remember that when you save a document, you saved it with a name called file name.
To open files follow this process:
In case the file is saved inside a folder, double click the folder, t en click your file name.
INSERTING TEXT
Text can be inserted into a word, line, sentence or a paragraph into a document
DELETING TEXT
A text can either be deleted to the right or left of a cursor to delete text to the right of a cursor, do these:
To delete text to the left of the cursor, do these:
DELETE LONG SENTENCES OR PARAGRAPH
CUT AND PASTE
A paragraph or line within a document can be taken to another part of the same document or to a different document. You can also decide to remove a picture from a position and place it to be part of another document. This can be done by cutting and pasfng. This commands can be found under the edit menu or by using the icons on the standard tool bar.
CUT AND PASTE:
COPY AND PASTE
When you copy, you are creating a duplicate of what you copied. You can copy a document, sentence, paragraph or a picture.
To copy:
Formatting a text or document can make your work look very attractive. Through formatting, the sizes of your characters can be reduced or increased depending on your choice. You can also change your characters to italics or bold face your characters etc. Some of the features we can use includes: the different fonts, font size, bold, italics underline etc. All can be found either on the FORMAT MENU or on the FORMAT TOOLBAR
Look at the format toolbar above as we go step by step to learn how to format our document.
The tiny arrow in front of the font lis show where you have different font types. This can be described as different method of writing.
Or
FONT SIZE
After the font list on the format tool bar shown above, is the font size. This is where you have a number shown with a tiny black arrow in front of it.
To select font size, do these.
FONT STYLE
Fonts or characters can be in different styles e.g. bold, italics or underline.
B-BOLD
I-ITALICS
U - UNDERLINE
ALIGN YOUR TEXT OR DOCUMENT
The facilities for aligning text can be found on the format tool bar. Text alignment can be left right center or justify.
To align your document or text. To do the following:
CHANGE CHARACTER CASE
� � � �i.) Sentence case
� � � �ii.) Lowercase
� � � iii.) Uppercase
� � � iv.) Title Case
A table can be described as tabular columns and rows which intersect at some point. The rectangular point at which a row and column intersect is called cell. Microsoft word offers the facility for creating table. These facilities can be found either on the standard tool bar or on the menu called TABLE.

Before using the facility provided by Microsoft word to create a table, the user must first decide the number of columns and rows to be found on the table to be created.
To create a table of five columns and five rows follow the following steps.
(A dialog box as this seen on the next page appears on the screen).
Data can be entered into a table by creating an insertion point in the first cell on the top roll.
Then you can continue to type. As you type, the characters begin to push the lines to the right. Once you are through with the width of the cell, you can press Enter key to lengthen the cell in case you need to.
You can move the cursor around a table simply by using the arrow keys i.e Up, Down, Left and Right arrow keys, depending on which ever cell or direction you want to move.
Pressing right arrow key moves the cursor to the next cell by the right. While pressing down arrow moves the cursor to the cell below the cell where your cursor is.
�
ASSESSMENT AND EVALUATION
(i) Identify the title bar a word processor
(ii). Identify and use menu installed
iii).Identify tools bar and its Functions
�IV Identify and use the tool
V Bold, underline and Italicize text
Vi Format font type, font Size and color
�
WRAP-UP (CONCLUSION): Teacher goes over the topic once again for better understanding
ASSIGNMENT
Create a folder on your computer.
� Lesson Notes All Rights Reserved 2023