Lesson Notes By Weeks and Term - Primary 2
2-D Shapes/Symmetry
2-D Shapes/Symmetry
TERM: 3rd Term
WEEK: 6
CLASS: Primary 2
AGE: 7 years
DURATION: 5 periods of 40 minutes each
DATE:
SUBJECT: Mathematics
TOPIC: 2 D-shapes/Symmetry
SPECIFIC OBJECTIVES: At the end of the lesson, the pupils should be able to
INSTRUCTIONAL TECHNIQUES: Explanation, question and answer, demonstration, practical
INSTRUCTIONAL MATERIALS: Scrap paper, old magazines, Paper shapes (circle, square and triangle per group), pictures of butterflies (optional –e.g. from old magazines).
PERIOD 1: 2-D shapes
PRESENTATION | TEACHER’S ACTIVITY | PUPIL’S ACTIVITY |
STEP 1 MENTAL MATHS | The teacher begins the lesson with some mental calculations Ask the learners to start at 4 and count on in 4s until they reach 40. | Pupils respond and participate |
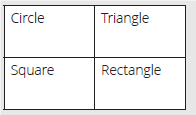
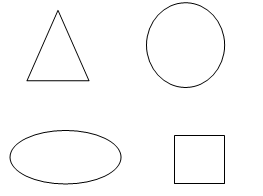
STEP 2 CONCEPT DEVELOPMENT | The teacher • Gives each pair of learners a piece of scrap paper. Ask them to fold the scrap paper into four equal parts (quarters). • Says: Draw lines on the folds on your scrap paper. • Writes the names of the shapes on the board for them to copy onto their folded pieces of paper. One of the following names should go in each quarter: circle, rectangle, square and triangle (as in the previous lesson).
• Asks the learners to cut pictures from their magazine pages of objects that show the four shapes that they have written on their A4 pieces of paper.
They can paste the pictures into the quarters on the scrap paper according to the labels written in the quarters. Learners may also draw pictures of four shapes. They need to find as many pictures as possible and/or include as many drawings as possible.
ACTIVITY II The teacher • Calls pairs of learners to the front of the class to show and explain their pictures to the rest of the class. Each pair of learners should have a chance. Let them explain only one type of shape if there is not enough time for them all to explain all of their shapes. They have to include the following in their explanations: Shape Size Colour Sides – straight or round. (One object may include several shapes or may be just one of the shapes that the learners are looking for). | Pupils pay attention and participate |
STEP 3 CLASS-WORK | 1 Draw a house using the following shapes: a 2 circles. b 4 rectangles. c 1 triangle. d 2 squares.
2 Colour the shapes in the house in the following way: a One red circle. b One green rectangle. c One yellow triangle | Pupils attempt their class work |
STEP 4 HOME-WORK | 1 Draw a picture using different shapes and colour it in any way you choose.
2 Write about how you coloured your shapes.
| The pupils writes it in their homework book |
STEP 5 SUMMARY | The teacher summarizes by reminding the pupils that in this lesson we have learnt about 2-D shapes and their properties.
She marks their class works, makes corrections where necessary and commends them positively |
|
PERIOD 2: Symmetry
PRESENTATION | TEACHER’S ACTIVITY | PUPIL’S ACTIVITY |
STEP 1 MENTAL MATHS | The teacher begins the lesson with some mental calculations Calculate 1 20 – 6 = 2 19 – 4 = 3 14 + 4 = 4 15 + 2 = 5 21 – 1 = 6 26 – 5 = 7 24 + 4 = 8 28 + 4 = 9 30 + 10 = 10 20 – 10 = | Pupils respond and participate |
STEP 2 CONCEPT DEVELOPMENT | The teacher Symmetry in 2-D shapes: • Uses the prepared paper shapes. Give each group of learners a paper circle, square and triangle. • Asks them to fold all three of the shapes exactly in half. • Unfolds the shapes and make a dotted line where the fold is. • Explains to the learners that we call this the line of symmetry. • Discusses the shape, the position of the fold in the shape and what the two halves of the shape on either side of the fold look like.
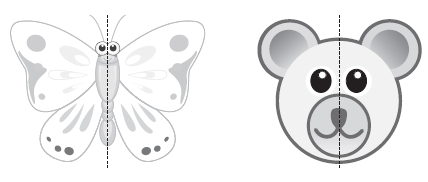
CLASS ACTIVITY The teacher Symmetry in ourselves: • Calls a learner to the front of the class and ask the learner to stand looking straight at the class. • Discusses the symmetry of the human body. Point out: a One eye on each side, b One ear on each side.
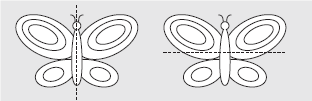
ACTIVITY II The teacher • Refers to the picture of the butterfly template in the LAB. • Draws two similar butterflies on the board, as shown below. • Draws the two lines as shown.
• Asks: Which line is a line of symmetry? (The vertical one.) • Asks: Which line is NOT a line of symmetry? (The horizontal one.) • Asks: Why is the horizontal line not a line of symmetry? (If you fold along the horizontal line, the two parts do not fit exactly onto each other; the two parts on either side of the horizontal line are not mirror images of each other.) • Colours the two sides of the butterfly, using colours, in a symmetrical way.
| Pupils pay attention and participate |
STEP 3 CLASS-WORK | NOTE: Remind learners that when a shape is folded exactly in half a mirror image is created. The line of symmetry would go along that fold line. They can use that to imagine where a line of symmetry should go.
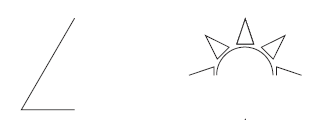
1 Draw lines of symmetry on the following shapes.
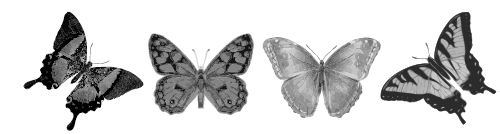
2 Draw the lines of symmetry in these butterflies. 3 Draw a circle. How many lines of symmetry can you draw on a circle?
4 Draw a face. How many lines of symmetry can you draw on a face? | Pupils attempt their class work |
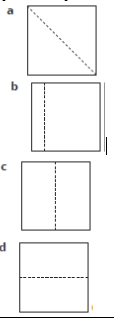
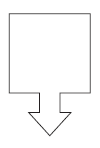
STEP 4 HOME-WORK | Do the drawings below show a line of symmetry? Answer yes or no each time.
| The pupils writes it in their homework book |
STEP 5 SUMMARY | The teacher summarizes by reminding the pupils that in today’s lesson we have learnt about lines of symmetry.
She marks their class works, makes corrections where necessary and commends them positively |
|
PERIOD 3: Symmetry
PRESENTATION | TEACHER’S ACTIVITY | PUPIL’S ACTIVITY |
STEP 1 MENTAL MATHS | The teacher begins the lesson with some mental calculations Calculate 1 20 – 6 = 2 19 – 4 = 3 14 + 4 = 4 15 + 2 = 5 21 – 1= 6 26 – 5 = 7 24 + 4 = 8 28 + 4 = 9 30 + 10 = 10 20 – 10 = | Pupils respond and participate |
STEP 2 CONCEPT DEVELOPMENT | The teacher • Refers to the picture of the shape strip. • Draws the same shapes on the board. The learners can look at the shapes on the board
• Discusses each shape, one at a time. • Asks: How many lines of symmetry does the shape have? Where is (are) the line(s) of symmetry? a No lines of symmetry: shapes 6, 10, 12. (These shapes are called asymmetrical.) b One line of symmetry: shapes 1, 14. c Two lines of symmetry: shapes 2, 3, 4, 5, 7, 8, 9, 11, 13.
• Allows the learners to identify the lines of symmetry themselves and let them show you on the board where the lines must go. • Allows some time for all of the learners to draw the lines of symmetry onto their shapes on the shape strips that you gave to them.
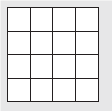
ACTIVITY II The teacher Draws a grid like the one below on the board and ask the learners to copy it into their classwork books.
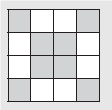
• Asks them to show you where the lines of symmetry would lie on this shape (the grid). The shape has 4 lines of symmetry. (The diagonals and the horizontal and vertical lines through the centre of the grid.) Now colour some of the blocks to make a pattern that still has 4 lines of symmetry. An example is shown below. • Shows how the same 4 lines of symmetry still work.
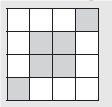
• Asks: Can you do other grid patterns that would also have 4 lines of symmetry? (Let learners show you drawings if they want to.) • Draws this grid pattern on the board:
• Asks: How many lines of symmetry does the following grid have? (2 – the diagonals. In this pattern the vertical and horizontal lines are not lines of symmetry.) • Discusses other grid pattern the learners have drawn of there is time. | Pupils pay attention and participate |
STEP 3 CLASS-WORK | 1 How many lines of symmetry can you draw in these shapes? Draw them.
2 Use the grid to make a symmetrical design. a Make a pattern in it that has 2 lines of symmetry.
b Make a pattern in it that has 4 lines of symmetry.
| Pupils attempt their class work |
STEP 4 HOME-WORK | 1 Draw a shape with: a One line of symmetry. b Two lines of symmetry. c Four lines of symmetry. 2 Draw the lines of symmetry in your shapes. | The pupils writes it in their homework book |
STEP 5 SUMMARY | The teacher summarizes by reminding the pupils that in today’s lesson we have learnt about lines of symmetry..
She marks their class works, makes corrections where necessary and commends them positively |
|
PERIOD 4: Assessment
PRESENTATION | TEACHER’S ACTIVITY | PUPIL’S ACTIVITY |
STEP 1 ORAL ASSESSMENTS | The teacher asks questions on mental maths treated so far | Pupils respond and participate |
STEP 2 DISCUSSION | The teacher discusses all the methods used by some learners in the oral assessments(some of the questions are solved on the board by the learners) and addresses any misconceptions that may have risen | Pupils pay attention and participate |
STEP 3 WRITTEN ASSESSMENTS | 1 Name this shape. 2 Look at the picture below.
a Put a tick on the shapes with straight sides. b Put a cross on the shapes with shapes have round sides.
3 Draw the line of symmetry in the drawing.
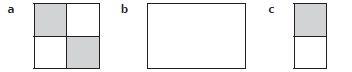
4 Draw one shape in each block. a A shape with round sides
b A shape with straight sides
5 Draw two circles of different sizes. | Pupils attempt their class work |
STEP 4 SUMMARY | The teacher marks the written assessments, corrects were necessary and commends the pupils |
|
PERIOD 5: Weekly Test/consolidations
TEACHER’S ACTIVITY: The teacher revises all the concepts treated from period 1-4 and gives the pupils follow through exercises, quiz and tests. She marks the exercises, makes corrections and commends the pupils positively.
PUPIL’S ACTIVITY: The pupils work on the worksheets and exercises given by the teacher individually
CONSOLIDATION
1 Draw a line of symmetry through each of the following pictures:
2 Colour each side of the picture a different colour
3 Complete these pictures by:
a Drawing the exact other half.
b Drawing in the line of symmetry.
3 Draw a circle, a triangle and a rectangle. Draw the line of symmetry in each shape.
© Lesson Notes All Rights Reserved 2023